


· Please check whether the scanner connection is normal before calibration
· Open the software desktop icon “ Dental Link ”

· Click the Calibration button to start the process

· Click the “Calibration” button on the menu to enter the calibration process
(Never touch the Calibration Board surface.Ensure the board remains clean and intact)

· Place the Calibration Board as illustrated below and adjust camera and projector brightness

· Click Start to initiate
· Await “Calibration Success!” prompt
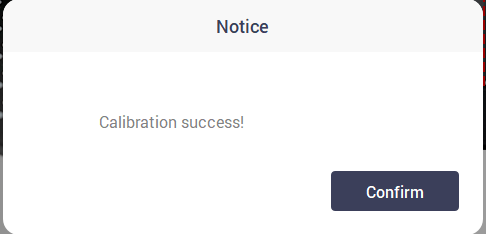
· If it is a model below QXP, click “Close”
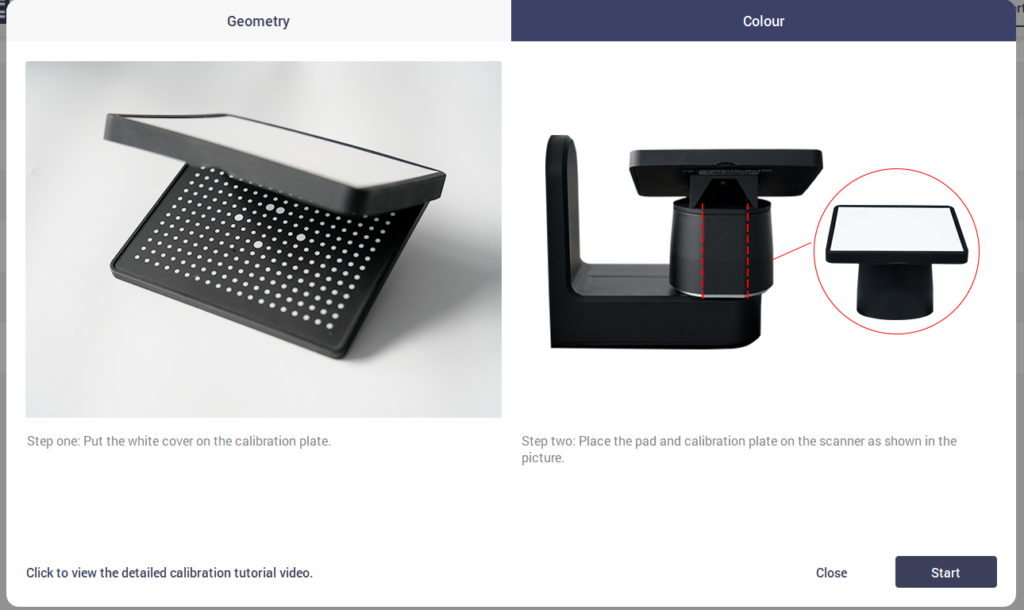
· If it is a QXP or above model, place the white cover as shown
in the picture and click “Start” to perform color calibration
· Await “Calibration Success!” prompt.Then click “Close”